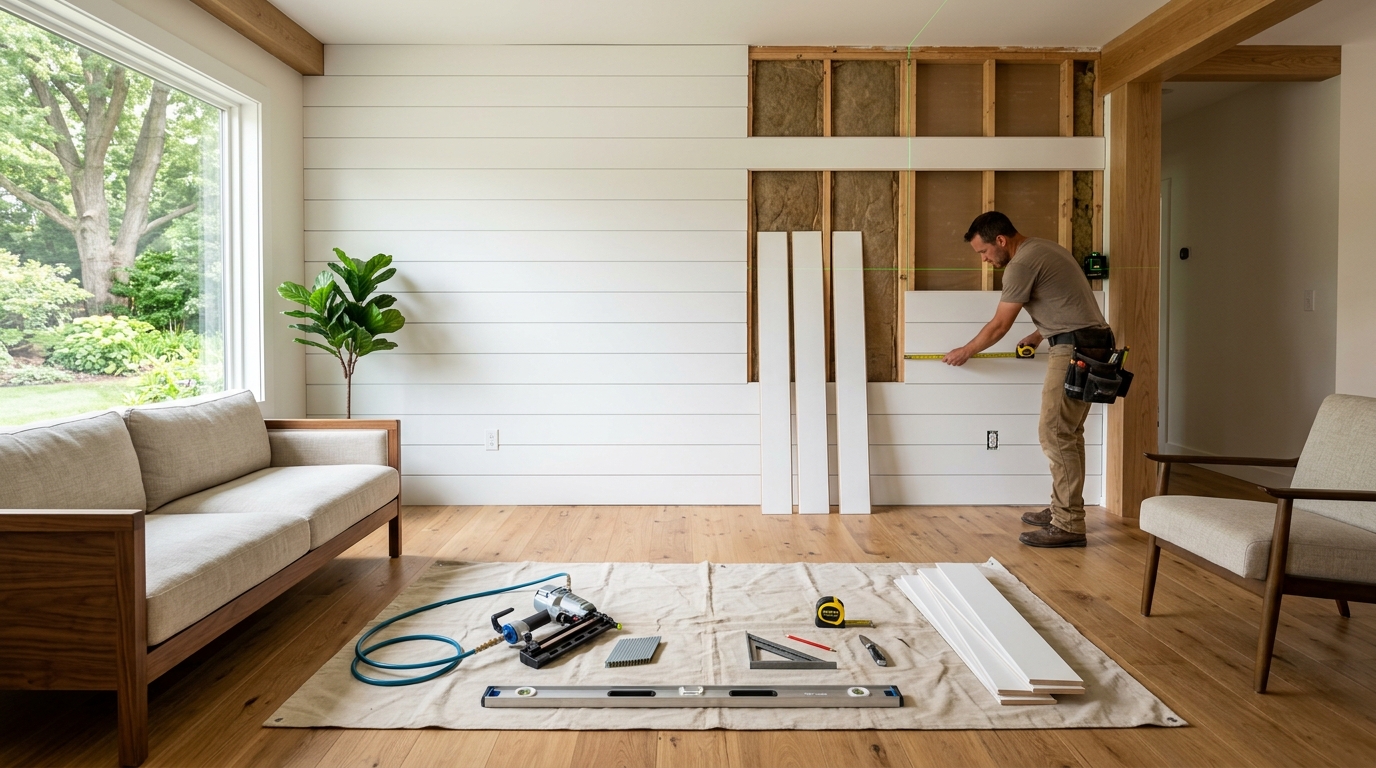
Installing a horizontal or vertical shiplap accent wall is one of the highest-impact interior design upgrades you can undertake. Whether you are aiming for a classic modern farmhouse look, a crisp Scandinavian aesthetic, or a bold transitional focal point behind a bed or fireplace, a well-executed shiplap wall adds rich architectural texture and tactile warmth to any room.
However, improper installation—such as nailing into drywall without stud backing, skipping lumber acclimation, or failing to account for uneven ceilings—can lead to buckled boards, visible popped nails, and unsightly gaps.
In this comprehensive, master-carpenter-audited guide, we will walk you through every phase of planning, measuring, cutting, fastening, and finishing your shiplap accent wall with professional-grade precision.
Project Overview & Quick Reference
| Parameter | Specification |
|---|---|
| Skill Level | Beginner to Intermediate (DIY Friendly) |
| Time Required | 4 to 8 hours for a standard 12ft × 8ft wall |
| Average Material Cost | $2.50 – $7.00 per sq. ft. (MDF vs. Pre-Primed Pine) |
| Recommended Fastener | 2.0” 16-Gauge Finish Nails (or 18-Gauge Brad Nails) |
| Framing Requirement | Minimum 1.0” stud penetration into 2×4 framing |
| Recommended Waste Factor | 10% to 15% extra for end cuts and top-course ripping |
💡 Planning Your Lumber Order? Use our free interactive Shiplap Calculator to instantly calculate exact board counts, square footage, linear footage, and box packages based on your exact wall dimensions.
Essential Tools & Materials Checklist
Before making your first cut, ensure you have gathered all necessary materials on your drop cloth.
Required Materials
- Shiplap Boards: Pre-primed MDF or finger-jointed pine (1×6 or 1×8 profiles are industry standard).
- Fasteners: 2-inch 16-gauge pneumatic finish nails (or 18-gauge brad nails).
- Construction Adhesive: Loctite Power Grab, Liquid Nails Heavy Duty, or DAP Dynagrip (optional, recommended for warped boards).
- Electrical Box Extenders: Non-conductive single/double gang outlet extenders (e.g., Arlington BE1).
- Wood Filler & Spackle: Lightweight spackle or shrink-free wood filler for nail holes.
- Paintable Caulk: High-flexibility elastomeric acrylic latex sealant.
- Finish Paint & Primer: Satin or eggshell interior latex paint.
Required Tools
- Pneumatic or Cordless Brad Nailer / Finish Nailer (with air compressor if pneumatic)
- Miter Saw / Chop Saw (with 60+ tooth fine finish carbide blade)
- Table Saw or Circular Saw with Edge Guide (for the final top rip course)
- 4-Foot Spirit Level or Self-Leveling Cross-Line Laser Level
- Precision Electronic Stud Finder
- Chalk Line or 6-Foot Aluminum Straightedge
- Tape Measure, Carpenter’s Pencil, and Speed Square
- Safety Glasses, Ear Protection, and Dust Mask
Phase 1: Planning, Wall Prep & Lumber Acclimation
1. Acclimate Your Boards (Crucial Step)
Wood is a natural, hygroscopic material that expands in high humidity and contracts during dry winter heating cycles. Even pre-primed MDF expands slightly based on ambient indoor moisture.
- Bring your lumber into the installation room at least 48 to 72 hours prior to cutting.
- Cut open the plastic bundles and cross-stack the boards on stickers (scrap wood slats) to allow air to circulate around all four sides.
- Installing un-acclimated wood directly from a damp lumber yard will result in shrinkage gaps along the rabbet lap seams within weeks.
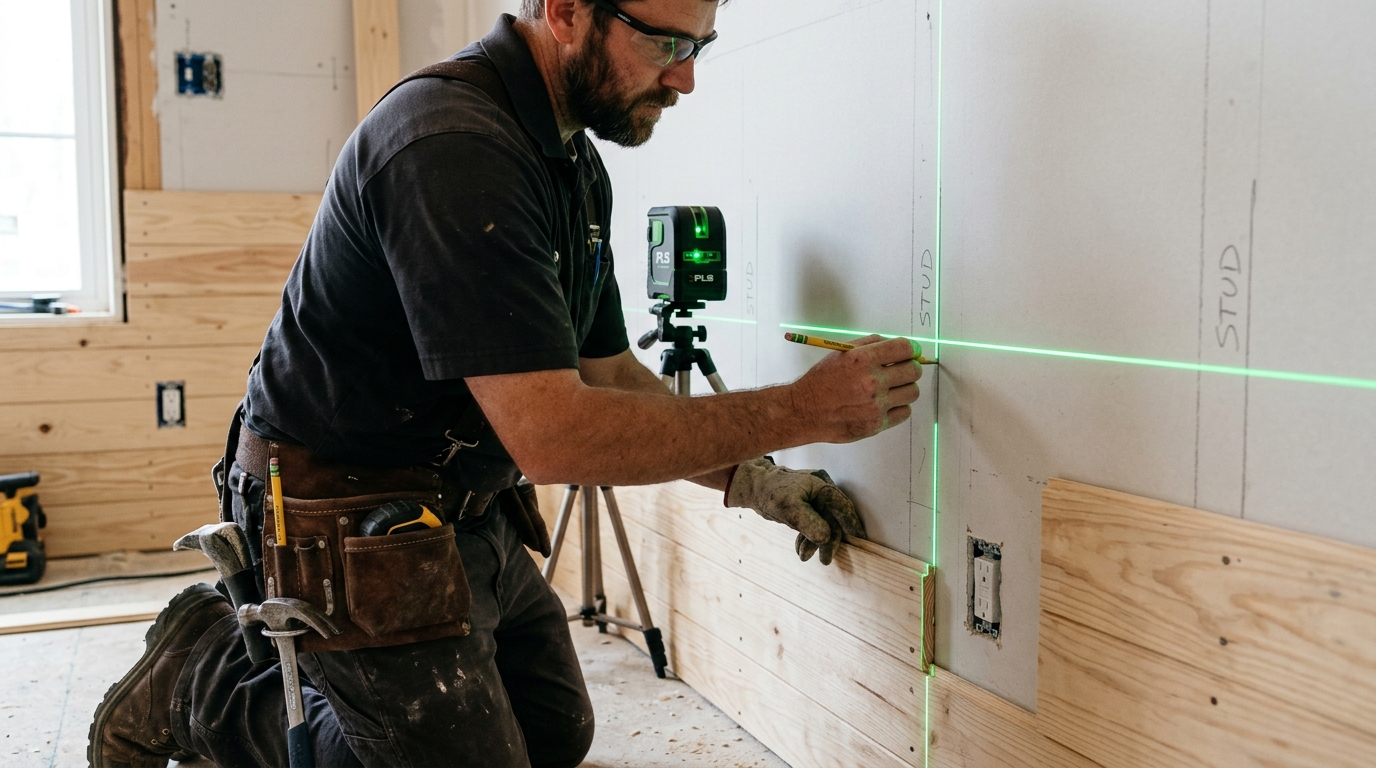
2. Locate and Mark Every Wall Stud
Shiplap must be anchored into solid 2×4 or 2×6 structural wall framing studs—never drywall anchors alone.
- Use an electronic stud finder to locate studs across the entire wall.
- In standard North American residential construction, studs are spaced 16 inches on-center (or 24 inches on-center in some advanced framing).
- Mark stud centers at the floor, midpoint, and ceiling.
- Snap vertical chalk lines or draw vertical pencil lines along each stud location. These lines give you a foolproof visual target when shooting nails through the boards later.
3. Manage Electrical Outlets and Switch Plates
Turn off the circuit breaker to the wall before working near outlets.
- Remove all decorative outlet covers and switch plates.
- Because adding ½” or ¾” shiplap increases the wall thickness, your electrical outlets will be recessed too deeply inside the wall cavity, violating National Electrical Code (NEC Article 314.20).
- Install box extender rings (caddy extenders) so that the outlet face sits flush with the new shiplap surface.
Phase 2: Setting the Level Reference Baseline
One of the most common rookie mistakes is placing the first board flat against the floor and assuming it is level. Residential subfloors and baseboards frequently slope up to ½ inch across a 12-foot span. If your starting course is unlevel, every subsequent course will compound the error until the top row is severely crooked.
Step-by-Step Baseline Setup:
- Find the Low Point: Measure down from your ceiling in several spots, or set up a self-leveling laser level across the bottom 6 inches of the wall.
- Mark Your Guide Line: Snap a true horizontal chalk line across the wall where the top edge of the first board will land.
- Shim as Needed: Place the first board against the wall with the rabbet tongue facing upward. If the floor dips, place wood shims underneath the bottom edge until the board’s top edge aligns perfectly with your laser line.
- Fasten First Board: Drive two 2-inch 16-gauge nails into every marked stud line.
Ceiling Line ──────────────────────────────────────── (Often uneven)
  ▲
  │   [Course 14 - Ripped Top Board]
  │   [Course 13 - Full Shiplap Board]
  │   [Course 12 - Full Shiplap Board]
  │   ...
  │   [Course 2 - Full Shiplap Board]
  │   [Course 1 - Leveled with Shims] ◄── Start Level Here!
  ▼
Floor Line ~~~~~~~~~~~~~~~~~~~~~~~~~~~~~~~~~~~~~~~~~~ (Uneven floor)
Phase 3: Fastening Techniques & Joint Overlap
Shiplap boards feature half-lap rabbet joints on the top and bottom edges. The bottom rabbet of the upper board rests over the top rabbet lip of the lower board.
Where to Nail:
- Blind Nailing (Through the Top Lip): Angle a nail at roughly 45 degrees directly through the protruding upper rabbet tongue into the stud. When the next board slides down over the joint, it naturally conceals the nail head!
- Face Nailing: For boards wider than 6 inches (such as 1×8 or 1×10), shoot a second face nail approximately 1 inch up from the bottom edge into each stud. This prevents the wide plank from cupping over time.
- Stud Crossing Rule: Use two fasteners per stud crossing on 1×6 and 1×8 boards.
🧮 Need an exact nail count? Calculate fastener boxes with our Shiplap Fastener & Nail Estimator.
Phase 4: Staggering Butt Joints Across Wide Walls
If your wall is wider than the standard 8ft or 12ft boards you purchased (for example, a 16-foot living room accent wall), you will need to join boards end-to-end.
Rules for Clean Butt Joints:
- Always Land on a Stud: Every end-to-end joint must center directly over a 1½-inch wooden wall stud so both board ends can be securely nailed.
- Bevel Your Ends (Scarf Joint): Instead of a flat 90° square cut, cut adjoining board ends at a 45° bevel angle (scarf joint). A beveled joint overlaps seamlessly, hides wood movement, and prevents noticeable shadows under lighting.
- Stagger Seams by at least 24 to 32 Inches: Never place butt joints on the same stud in adjacent rows. Stagger seams in an irregular or 3-stud step pattern across the wall surface.
Row 4: ├────────────── 10ft Board ──────────────┤└─── 6ft Board ───┤
Row 3: ├── 4ft Board ──┤├────────────── 12ft Board ───────────────┤
Row 2: ├──────── 8ft Board ────────┤├──────── 8ft Board ──────────┤
Row 1: ├── 5ft Board ──┤├────────────── 11ft Board ───────────────┤
Phase 5: Ripping the Final Top Course
As you reach the top of the wall, measure the remaining distance between the top lip of the last full board and the ceiling. Measure at the left corner, center, and right corner.
- If the ceiling slopes (e.g. 3½” on the left and 3⅛” on the right), mark both measurements on your final board and connect the points with a straightedge.
- Rip the board lengthwise using a table saw or circular saw with a rip fence.
- Angle the top edge slightly with a 5° back-bevel for easier insertion against the ceiling drywall.
- Push the board firmly into place and face-nail directly into the top wall framing plate.
Phase 6: Trim & Transitions
Depending on your room layout, finish your edges using one of the following architectural trim profiles:
- Inside Corners: Butt boards directly against adjoining drywall and seal with a neat bead of paintable acrylic caulk.
- Outside Corners: Install a 1×2 or 1×3 pre-primed corner moulding or custom miter the boards at 45 degrees.
- Baseboard Integration: Either install shiplap resting cleanly on top of existing baseboards, or remove the baseboard, install shiplap to the subfloor, and re-install baseboards over the shiplap face for a craftsman look.
Phase 7: Caulking, Hole Filling & Painting
- Fill Nail Holes: Dab lightweight interior spackle or wood filler over each nail head. Let dry for 30 minutes, then sand flush with 220-grit sandpaper.
- Caulk Perimeter Gaps: Run a continuous bead of elastomeric caulk along inside corners, ceiling transitions, and baseboard junctions. Smooth immediately with a damp finger or sponge.
- Do NOT Caulk the Horizontal Reveal Seams: Never caulk the horizontal shadow gaps between shiplap boards! Filling these seams traps moisture, ruins the architectural shadow effect, and causes the paint to crack as the wood moves.
- Prime & Paint: Apply two coats of premium interior latex paint (Satin or Semi-Gloss for durability and cleanability) using a ⅜” nap microfiber roller and a 2½” angled sash brush for edges.
Estimated Project Cost Breakdown (12ft × 8ft Wall = 96 Sq. Ft.)
| Material / Item | Quantity | Estimated DIY Cost | Contractor Cost |
|---|---|---|---|
| Pre-primed 1×6 MDF Shiplap | 110 Sq. Ft. (inc. 15% waste) | $275 – $350 | $300 – $400 |
| Fasteners (2” 16-Ga Nails) | 1 Box (1,000 count) | $15 – $22 | Included in labor |
| Construction Adhesive | 2 Tubes | $12 – $16 | Included in labor |
| Caulk, Spackle & Sandpaper | 1 Kit | $20 – $25 | Included in labor |
| Paint & Primer (1 Gallon) | 1 Gallon | $45 – $65 | $50 – $75 |
| Professional Carpentry Labor | ~6 Hours | $0 (DIY) | $450 – $750 |
| Total Investment | — | $367 – $478 | $800 – $1,250 |
💰 Want to explore different materials? Compare pine, cedar, and vinyl siding costs with our Shiplap Cost Estimator.
Frequently Asked Questions (FAQ)
1. Do I have to remove my existing baseboards before installing shiplap?
Not necessarily. If your existing baseboard has a flat top ledge that is at least ½-inch thick, you can install the shiplap resting directly on top of the baseboard. However, if your baseboard is thin (like standard ⅜” clamshell moulding), the shiplap will overhang the trim. In that case, removing the baseboards and reinstalling them over the shiplap creates a much cleaner architectural reveal.
2. Can I install shiplap with nails only, or is adhesive mandatory?
For standard interior accent walls over wooden framing studs, nails alone are sufficient provided you shoot two 2-inch nails into every solid 2×4 stud. Construction adhesive is only necessary if your studs are irregular, if you are installing over masonry/concrete with furring strips, or on ceilings where gravity creates constant downward tension.
3. What size nails should I use for shiplap over drywall?
Use 2-inch 16-gauge or 18-gauge finish nails. Standard residential drywall is ½-inch thick. A 2-inch nail passes through the ½” shiplap board, ½” drywall, and penetrates a solid 1.0 inch into the framing stud, fulfilling international residential building codes.
4. Should I paint the shiplap before or after putting it on the wall?
If you are using raw, unprimed wood, apply a primer and one coat of paint to the tongues and rabbet lips before installation. That way, when the wood shrinks in dry winter months, bare raw wood won’t be exposed inside the shadow reveals. If using factory pre-primed boards, you can install first and paint the final coats on the wall.
5. How do I transition shiplap around electrical outlets?
Use UL-listed non-metallic electrical box extenders (also known as “goof rings”). Slide the extender over the outlet box so it extends flush with the front of the shiplap. This ensures screws and wires remain enclosed in a fire-rated barrier compliant with electrical code.